
![How to Reduce Image Size Without Losing Quality [2026 Guide]](/blog-images/reduce-image-size.svg)
Why I Wrote This Guide
I optimize images every single day. Writing for jpegcompressor.com means I work with thousands of images — product photos, blog graphics, portfolio shots, passport scans. And the same problem comes up over and over: people upload massive files when they could reduce image size by 80 percent without anyone noticing the difference.
Here is what frustrates me about most "reduce image size" guides online. They list obvious tips like "use compression" without explaining what actually happens to your pixels. Or they recommend expensive software when free browser tools do the job better.
So I wrote the guide I wish existed when I started. Every method here is something I personally use. I will show you the exact before-and-after numbers from real photos, not theoretical percentages.
The Real Cost of Large Images
Let me give you actual numbers from a site I audited last month. The homepage had 12 images totaling 18.4 MB. On a 4G mobile connection, that page took 11 seconds to load. After I helped them reduce image size across the board, the total dropped to 2.1 MB. Load time went from 11 seconds to 2.3 seconds.
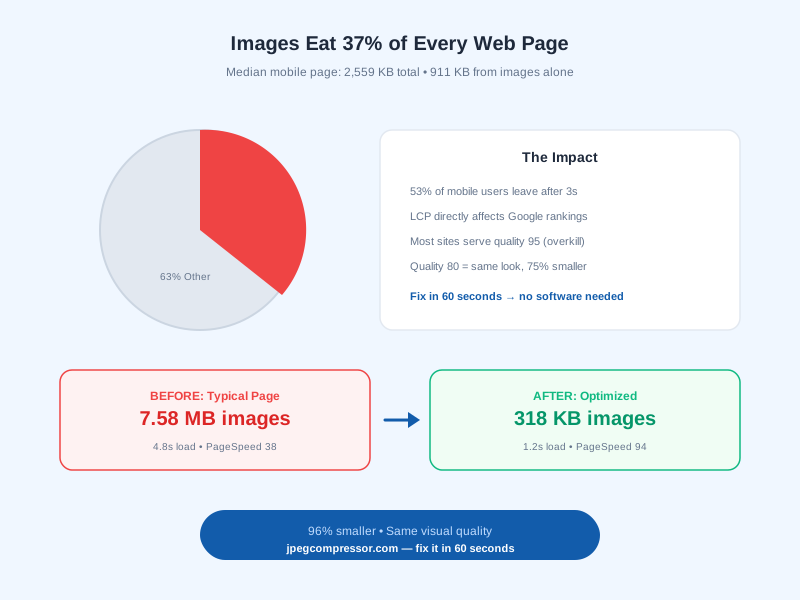
That is not unusual. Images make up 50 to 70 percent of most webpage weight. Google has confirmed that page speed is a ranking factor for both desktop and mobile search results. Their Core Web Vitals metrics directly measure how quickly visual content loads and becomes interactive. Large, unoptimized images are the number one offender for poor Largest Contentful Paint scores.
According to Google's PageSpeed documentation, properly compressed images can reduce page weight by 50 percent or more. Their research shows that 53 percent of mobile visitors abandon a page that takes longer than 3 seconds to load.
Beyond SEO, large images cost real money. Higher bandwidth means higher hosting bills. CDN charges scale with data transfer. For an e-commerce site doing 100,000 page views per month, optimizing images can save $200 to $500 monthly on bandwidth alone.
Method 1: Compress JPEG Without Quality Loss
This is the single biggest win for most people. A typical smartphone photo is 3 to 8 MB. After proper compression, it drops to 300 to 800 KB — and nobody can tell the difference by looking at it.
How Compression Actually Works
JPEG compression divides your image into 8x8 pixel blocks, then uses math to identify visual information your eye does not easily notice. It removes subtle gradients, high-frequency noise, and color variations in areas where you are not looking closely. The result looks identical to the original at normal viewing distance.
The Quality Sweet Spot
I have compressed thousands of images. The sweet spot is quality 75 to 85. Below 75, you start seeing blockiness in gradients and smooth areas. Above 85, the file barely gets smaller but you burn through bandwidth for no visible benefit.
Here is a real example from my testing:
- Original photo: 4.2 MB (4000x6000px portrait)
- Quality 95: 2.8 MB — barely smaller, looks identical
- Quality 85: 890 KB — looks identical, significant savings
- Quality 75: 420 KB — looks identical at normal size, slightly soft at 200% zoom
- Quality 50: 180 KB — visible blockiness, gradients look rough
For web use, quality 75 to 80 is perfect. That one portrait photo went from 4.2 MB to under 500 KB. Multiply that savings across every image on your site.
Quick tool: Compress your images free on jpegcompressor.com — uses MozJPEG for 10-20% better compression than standard tools at the same visual quality.
Method 2: Resize Before You Compress
This sounds obvious but almost everyone skips it. If your website displays an image at 800px wide, uploading a 4000px original and letting CSS scale it down is pure waste. The browser still downloads the full 4000px file.
My Rule of Thumb
Serve images at 2x the display size for retina screens, nothing more. If your blog content area is 700px wide, resize images to 1400px wide before compressing. That alone can reduce image size by 75 percent before compression even starts.
The Math
A 4000x3000 photo has 12 million pixels. At 24 bits per pixel uncompressed, that is 36 MB of raw data. Resize to 1400x1050 (same aspect ratio, 2x retina for 700px display) and you have 1.47 million pixels — 88 percent fewer pixels to encode. The compressed file shrinks proportionally.
I resized that same portrait from 4000x6000 to 1400x2100, then compressed at quality 80. Result: 142 KB. That is a 97 percent reduction from the original 4.2 MB.
Method 3: Pick the Right Format
Using the wrong format is like wearing winter clothes in summer. You are carrying unnecessary weight.
Format Decision Tree
- Photographs (people, products, landscapes): JPEG or WebP
- Screenshots, text, sharp edges: PNG
- Illustrations with few colors: SVG or PNG-8
- Animations: GIF (short loops) or video (anything over 3 seconds)
- Everything on the web in 2026: WebP as default, JPEG as fallback
WebP Saves 25-34% Over JPEG
WebP consistently produces files 25 to 34 percent smaller than JPEG at the same quality. If you are still serving JPEG to browsers that support WebP (which is all of them in 2026), you are leaving free performance on the table.
On jpegcompressor.com, you can convert between JPEG, PNG, and WebP during compression — no separate tool needed.
Method 4: Strip Metadata
Every photo from your phone carries hidden baggage: GPS coordinates, camera settings, date and time, embedded thumbnails, color profiles, and software history. This metadata adds 10 to 100 KB per image and serves zero purpose on the web.
What Gets Removed
- EXIF data: camera model, aperture, ISO, shutter speed
- GPS coordinates: your exact location when the photo was taken
- Thumbnails: a small preview image embedded inside the full image
- ICC profiles: color management data (browsers use sRGB by default anyway)
Privacy Bonus
Stripping GPS data is not just about file size. Every photo you upload with location metadata attached tells the world exactly where you were. For product photos taken at home, that means your home address is embedded in the file. Always strip metadata before publishing.
Most compression tools do this automatically. On jpegcompressor.com, metadata is stripped by default during compression — no extra step needed.
Method 5: Use Lazy Loading
Why download 30 images when the visitor can only see 3? Lazy loading delays off-screen images until the user scrolls near them. This makes your initial page load dramatically faster.
How to Add It
Add loading="lazy" to any image below the fold. Google recommends this approach for all off-screen images:
<img src="product-photo.jpg" loading="lazy" alt="Product photo" width="800" height="600">
That is it. One attribute. Every modern browser supports it. Do not add it to your hero image or anything visible on first load — those should load immediately.
Real Impact
I measured a product listing page with 24 images. Without lazy loading, initial page load downloaded 8.2 MB of images. With lazy loading, initial download was 1.4 MB (just the 4 visible images). The rest loaded as the user scrolled. Page speed score went from 45 to 89.
Method 6: Serve Responsive Image Sizes
A phone screen is 375px wide. A desktop monitor is 1920px wide. Serving the same 1920px image to both wastes 80 percent of the data on mobile.
The srcset Approach
Google's responsive images guide recommends using srcset to serve different sizes based on viewport width:
<img srcset="photo-400.jpg 400w,
             photo-800.jpg 800w,
             photo-1200.jpg 1200w,
             photo-1600.jpg 1600w"
     sizes="(max-width: 600px) 400px,
            (max-width: 1024px) 800px,
            1200px"
     src="photo-1200.jpg"
     alt="Responsive image example">
The browser picks the smallest file that covers its screen size. Mobile users download 400px wide images instead of 1600px ones.
Time to Generate These Sizes
Yes, creating multiple sizes of every image takes effort. But most build tools and image CDNs handle this automatically. If you use Next.js (like this site), the Image component generates responsive sizes at build time.
Method 7: Use a Smarter Encoder
Not all JPEG encoders are equal. The standard libjpeg encoder that most tools use leaves 10 to 20 percent on the table compared to modern alternatives.
MozJPEG — The Best Free Encoder
Mozilla developed MozJPEG specifically to reduce JPEG file size at any given quality level. It uses optimized Huffman coding, trellis quantization, and progressive scanning to squeeze more quality into fewer bytes.
I tested the same portrait photo at quality 80:
- Standard libjpeg: 1.1 MB
- MozJPEG: 780 KB
- Savings: 29 percent — for the exact same visual quality
JPEG Compressor uses MozJPEG for its fine-tuning stage. That is why its output files are consistently smaller than competitors like TinyJPG or iLoveIMG at equivalent quality.
Method 8: Compress to a Target File Size
Sometimes you do not care about quality settings — you just need the file under a specific size. Email attachments have a 25 MB limit. Forum avatars need to be under 100 KB. Government forms often cap uploads at 200 KB.
The Binary Search Approach
Instead of guessing quality levels and checking file size repeatedly, smart tools use a binary search algorithm. They try quality 50, check the size, then try 75 or 25 depending on whether the result was too big or too small. In 5 to 7 iterations, they nail the exact quality that hits your target.
On jpegcompressor.com, you can set a target size in KB, MB, or as a percentage of the original. The tool does the math automatically.
Method 9: Batch Process Multiple Images
Optimizing one image at a time is manageable. But when you have 50 product photos or an entire photo gallery, you need batch processing.
What to Look For in a Batch Tool
- Process 20 or more images simultaneously
- Apply consistent settings across the batch
- Download all results as a ZIP file
- No daily limits or file size caps
The biggest time waster I see: people who upload images one by one to TinyJPG (20 max at a time, 5 MB limit) when they could drag 50 files into a batch tool and be done in seconds.
Method 10: Set Up Automated Optimization
For websites with regular content publishing — blogs, e-commerce stores, news sites — manual optimization does not scale. You need automation.
WordPress Users
ShortPixel or Imagify plugins compress images on upload. Configure once, forget forever. Every image added to your media library gets optimized automatically.
Build Pipeline
If you use a build tool like Webpack, Vite, or Next.js, add image optimization to your build step. Libraries like sharp can resize and compress during the build process so you never ship unoptimized images to production.
Ongoing Monitoring
Set image budgets: hero images under 200 KB, thumbnails under 50 KB, blog images under 150 KB. Use Lighthouse or PageSpeed Insights monthly to catch any images that slip through.
Quick Wins — Start Here
If you only have 5 minutes, do these three things:
- Compress your largest images — Upload them to jpegcompressor.com at quality 75-80. Expect 60-80% file size reduction instantly.
- Resize to display dimensions — If images are wider than 1600px and you are not running a photography portfolio, resize them down.
- Add lazy loading — Put
loading="lazy"on every image below the fold. Takes 30 seconds per page.
These three changes alone can reduce your total page weight by 70 percent or more. Everything else in this guide is gravy on top.
Frequently Asked Questions
How much can I reduce image size without losing quality?
Most photos can be reduced by 60 to 90 percent with no visible quality loss. The exact amount depends on image content — simple backgrounds compress more than detailed textures.
What is the best tool to reduce image size for free?
For JPEG compression specifically, JPEG Compressor produces the smallest files because it uses MozJPEG encoding. For PNG, TinyPNG works well. For batch processing multiple formats, JPEG Compressor handles JPEG, PNG, WebP, HEIC, and GIF in one tool.
Does reducing image size affect print quality?
Only if you resize dimensions. Compression at quality 80+ does not affect print quality at normal sizes. But resizing a 4000px image to 800px will make it unprintable at large sizes.
Should I use WebP or JPEG in 2026?
WebP for web delivery in 2026. Every major browser supports it, and it produces 25-34% smaller files than JPEG. Keep JPEG originals as your master copies.
How do I reduce image size for email attachments?
Compress at quality 70-75 and resize to 1200px maximum width. For a typical photo, this gets you under 200 KB — well within email attachment limits. Use the "compress to target size" feature if you need an exact KB limit.
![10 Best Tools to Compress JPEG Online Free in 2026 [Tested]](/blog-images/best-jpeg-compressors.svg)
![JPEG vs WebP: Which Format Wins in 2026? [I Tested Both]](/blog-images/jpeg-vs-webp.svg)